
Create Images & Remove Objects From Photos in 2026
Generate original images from text prompts and clean up photos with AI object removal: prompt technique, a removal workflow, and where both still fail.
 UrwaTools Editorial Updated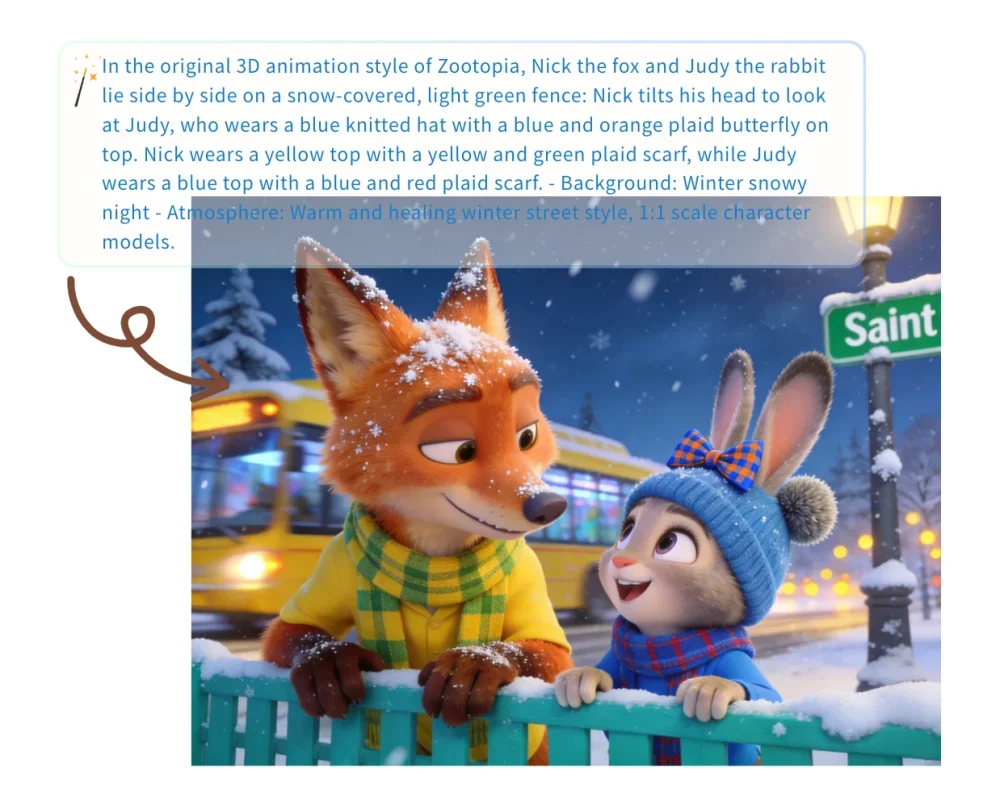
Contents
Creating images with AI and removing objects from photos used to be two separate skill sets, both of them expensive. One meant hiring an illustrator or trawling stock libraries for something "close enough." The other meant learning the clone stamp and content-aware fill in Photoshop. In 2026, both are a browser tab and a few seconds of processing.
This guide covers both halves of the job. You will learn how to write prompts that actually produce the image you pictured, how object removal works well enough to trust and where it still falls apart, and which free browser tools handle the unglamorous steps around the edges: resizing, compressing, converting, and getting the alt text right so the image earns its place in search.
None of this requires a subscription or a design background. It does require knowing what these tools are genuinely good at, which is the part most tutorials skip.
How AI image generation actually works for you
A text-to-image model turns a written description into a picture. You type a prompt, the model produces an image that matches it, and you iterate. That is the whole loop. The quality of what comes back depends almost entirely on how specifically you described what you wanted.
This matters most when you need something a stock library cannot give you. A photo of "a blue robot drinking coffee in a Parisian cafe, impressionist painting style" does not exist in any catalogue. An AI image generator will produce one in seconds, and it is original content rather than a licensed asset that ten thousand other sites are also using. For blog headers, ad creative, social posts, and website banners, that originality is the point.
Tools differ in the models they run, their output resolution, and how many generations they allow before asking for payment. Dedicated services such as the EZRemove AI image generator sit alongside the free browser options, and it is worth trying more than one — models have distinct visual biases, and a prompt that fails on one often works on another.
What AI generation is still bad at
Be realistic before you build a workflow on it. Text inside images remains unreliable across most models — signage, logos, and labels frequently come out garbled. Hands and fine anatomy have improved but still fail often enough that you should check every one. Consistency across a series is hard: getting the same character in five different poses usually takes far more attempts than generating five unrelated images. And no model reliably reproduces a specific real person, product, or brand asset. For those, photograph the thing.
Writing prompts that give you what you pictured
Vague prompts produce generic images. The fix is to describe four things explicitly rather than trusting the model to guess.
1. Subject and attributes
Name the main focus and its characteristics. "A car" gives you a generic sedan on a grey background. "A vintage red convertible sports car from the 1960s, chrome trim, worn leather seats" gives you something with a point of view. Colour, size, texture, age, and material all steer the result.
2. Action and setting
Say what the subject is doing and where. Running, sitting, mid-flight. A futuristic city, a dense jungle, a cluttered workshop at night. Setting carries most of the mood, and models fill an unspecified background with something bland by default.
3. Artistic style
This is the single highest-leverage word in most prompts. The same subject rendered as a photograph, a watercolour, and a 3D render are three completely different assets. Useful style terms include:
- Photorealistic, 8K, fine detail — for anything meant to pass as a photo
- Impressionist painting — soft edges, visible brushwork
- 3D render, cinematic lighting — product shots and hero images
- Watercolour illustration — editorial and blog headers
- Japanese anime style — character work
- Vintage black and white photo — documentary feel, hides model artefacts well
4. Lighting and composition
"Soft morning light," "dramatic studio lighting," and "neon glow" produce three different emotional registers from an identical subject. Composition terms work the same way: specify "wide-angle shot," "close-up portrait," or "view from above" instead of accepting whatever framing the model defaults to.
A worked example
Weak prompt: a woman in an office
Strong prompt: close-up portrait of a woman in her forties reviewing blueprints in a sunlit architecture studio, soft morning light through large windows, shallow depth of field, photorealistic, fine detail
Same idea. The second one tells the model what to do with every decision it would otherwise make on your behalf.
Removing objects from photos without the learning curve
Object removal solves the opposite problem: the image already exists, but something in it does not belong. A stranger who walked into frame, a rubbish bin behind the product, a distracting sign on the far wall.
The underlying technique is generative inpainting. You mark the region you want gone, and the model reconstructs what it believes was behind it, using the surrounding pixels as context. It is not erasing — it is inventing plausible replacement content. That distinction explains both why it works so well and where it breaks.
Where removal succeeds and where it fails
Removal is close to flawless when the background behind the object is simple and continuous: sky, grass, a plain wall, open water, blurred bokeh. The model has an easy pattern to extend.
It struggles when the background is structured or unique. Removing someone standing in front of ornate brickwork, a bookshelf, a crowd, or text signage often produces smeared or invented detail that a careful viewer will notice. Reflections and shadows are a common giveaway — the object goes, its shadow stays, and the image reads as wrong without the viewer being able to say why. Large removals from complex scenes are the hardest case of all.
Practical rule: zoom to 100% and check the boundary of the removed region and any surface where light should have changed. If the fix is not convincing, reframe or crop instead of fighting the tool.
A step-by-step object removal workflow
- Upload the original, not a compressed copy. Most browser tools accept JPG and PNG from a computer or phone. Work from the highest-quality version you have — recompression artefacts give the model bad context to reconstruct from.
- Brush over the object. You do not need surgical precision; the model infers boundaries. Do include the object's shadow and any reflection in your selection, because those will remain otherwise.
- Run the removal. Processing usually takes a few seconds. Adjust the brush size and try again if the first pass leaves a halo — slightly larger selections often fix edge artefacts.
- Inspect at full zoom. Check the patched region against the surrounding texture, then check lighting continuity across the whole frame.
- Export and then optimise. Download the clean version, then run it through an image compressor before publishing. Inpainting output is often larger than the original file.
The adjacent job: removing the background entirely
Sometimes the thing you want gone is everything behind the subject, not one object inside the scene. That is a different operation with a much higher success rate, because the model only has to find one edge rather than invent new content. An AI background remover handles product shots, profile photos, and cutouts for composites, and the transparent PNG it returns drops straight into a design tool or listing template.
Choosing the right tool for the job
Most people reach for a general image editor when a single-purpose tool would be faster. This table maps the common tasks to what actually solves them.
| What you need | Right approach | Reliability |
|---|---|---|
| An image that does not exist anywhere | Text-to-image generation from a detailed prompt | High for scenes and styles, poor for text and specific people |
| Remove a person or object mid-scene | Generative inpainting with a brush selection | High on simple backgrounds, mixed on complex ones |
| Isolate a subject from its background | Dedicated background removal to transparent PNG | High, including on fine edges like hair |
| Fit an image to platform dimensions | Resize to exact pixel dimensions | Deterministic |
| Shrink file size for page speed | Compression, then modern format conversion | Deterministic |
| Find where an image came from | Reverse image lookup | Good for indexed images, blind to unpublished ones |
Once the creative work is done, the remaining steps are mechanical. Use an image resizer to hit exact platform dimensions rather than letting a CMS scale the file in the browser, and convert with a PNG to WebP converter when you need modern-format delivery at a smaller size. If you need to check whether a generated image resembles something already circulating, a reverse image search will find indexed matches, though it cannot see images that were never published.
Publishing generated and edited images responsibly
Two things are worth settling before you publish AI images at scale.
The first is disclosure. Major platforms have moved toward labelling AI-generated media, and several image models embed provenance metadata in their output. Editing a photo to remove a distracting bin is a different act from generating a scene that never happened and presenting it as documentary — treat news, journalism, and evidence contexts as off-limits for generation, and label synthetic imagery where your audience would reasonably want to know.
The second is rights. Terms differ sharply between providers on commercial use and ownership of outputs, and they change. Read the specific terms of whichever generator you use before putting an image on a paid ad, and do not assume a free tier grants commercial rights.
Do not skip the alt text
An image with no alt attribute is invisible to screen readers and contributes nothing to search. Write a short, literal description of what the image shows rather than a keyword list — the two goals overlap more than people expect. An image alt text checker will flag pages where images are missing descriptions, which is usually a faster audit than clicking through your CMS. If the image is going to a social feed, an AI Instagram caption generator can draft the accompanying copy in the same sitting.
Why these tools changed the workflow
Speed. Tasks that were an afternoon of manual retouching now take seconds. The bottleneck moves from execution to deciding what you want, which is a better place for it to be.
Cost. Professional editing software carries a recurring subscription, and commissioning a designer for every small asset is not viable for most publishing schedules. Browser-based tools cover the routine cases at no cost.
Access. You no longer need training in a specific application to produce a clean, professional-looking image. The interface is a text box and a brush.
Iteration. Generation is cheap enough that you can explore ten directions instead of committing to the first workable one. That changes what you are willing to try.
Frequently asked questions
Can AI object removal handle any background?
No. It works reliably on simple, continuous backgrounds — sky, walls, grass, blur. On patterned brickwork, bookshelves, crowds, or text, the model has to invent detail and the result often looks smeared under close inspection. Check the patched area at full zoom before publishing.
Do I own the images an AI generator produces?
That depends entirely on the provider's terms, which vary and change. Some grant broad commercial use, others restrict it on free tiers, and copyright status for purely AI-generated work is unsettled in several jurisdictions. Read the terms of the specific tool before using an output commercially.
Why does AI-generated text inside images come out wrong?
Most image models treat text as visual texture rather than symbols, so letterforms come out approximately right and words come out wrong. If you need legible text on an image, generate the background and add the text yourself in a layout tool.
What file format should I publish AI images in?
WebP for web delivery in most cases — it is meaningfully smaller than JPG or PNG at comparable quality and is broadly supported. Keep PNG when you need transparency, such as a background-removed cutout. Compress before uploading either way.
Does removing an object reduce image quality?
The unedited parts of the image are untouched. The reconstructed region is newly generated content, so it can differ in noise and sharpness from its surroundings — that mismatch, rather than any global quality loss, is what makes a removal look edited.
Are free AI image tools good enough for professional work?
For blog headers, social graphics, internal decks, and product mockups, generally yes. For work that must be pixel-consistent across a campaign, reproduce a specific product accurately, or survive print-scale scrutiny, expect to need a paid tool or a human designer.
Where to start
Pick one real task rather than experimenting abstractly. If you need an original header for your next post, write a prompt with all four elements — subject, setting, style, lighting — and generate a handful of variations. If you have a photo held back by one distracting element, brush it out, inspect the patch at full zoom, and decide honestly whether it holds up. Then compress the result and give it proper alt text before it goes live.
The tools are good. They are not magic, and knowing exactly where they stop being reliable is what separates usable output from work that gets noticed for the wrong reasons.
Frequently asked questions
Is it hard to write a good AI prompt?
Not at all. It’s a skill you can learn quickly. Start with a simple idea and gradually add more details. Think of it as describing a picture to a friend. The more details you give them about the subject, setting, and style, the clearer the image becomes in their mind. It’s the same with an AI.
Will removing an object make my photo look fake?
With the right tool, no. Advanced AI algorithms are designed to create a seamless blend. They don't just smudge the area; they intelligently regenerate the background based on the surrounding environment, making the edit look natural and undetectable.
Do I need to download any software?
No, the best tools for image generation and object removal are web-based. This means you can access them directly from your browser on any device, whether it's a desktop computer, laptop, or smartphone. There’s no need to install or update any software.
The UrwaTools Editorial Team delivers clear, practical, and trustworthy content designed to help users solve problems efficiently. Our articles focus on accurac...